Learning to Manage Fonts in Windows (Unzipping, Installing and Uninstalling) is a lifehack every designer should know as fonts play a significant role in the life of graphic designers and they’re frequently used to achieve distinctive designs. Although the process may appear technical, it is actually quite straightforward. By accessing the appropriate paths and utilizing a combination of keyboard shortcuts and mouse clicks, designers can effortlessly navigate through the font management process.
Worry not fellow designer because we’re here to help:
Table of Contents
Let’s GO:
How to Unzip Fonts
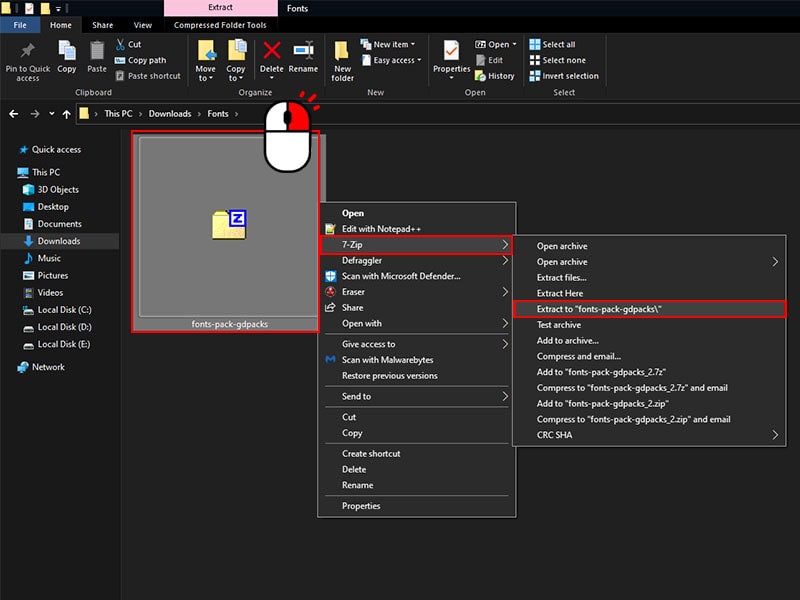
Fonts usually comes packed in a compressed manner so we suggest using the software 7-zip to do the task of uncompressing them as it’s free and open-source (FOSS).
- Right-click the the fonts zip or rar file with your mouse
- Choose the 7-zip option then go for Extract to a folder

How to Install Fonts
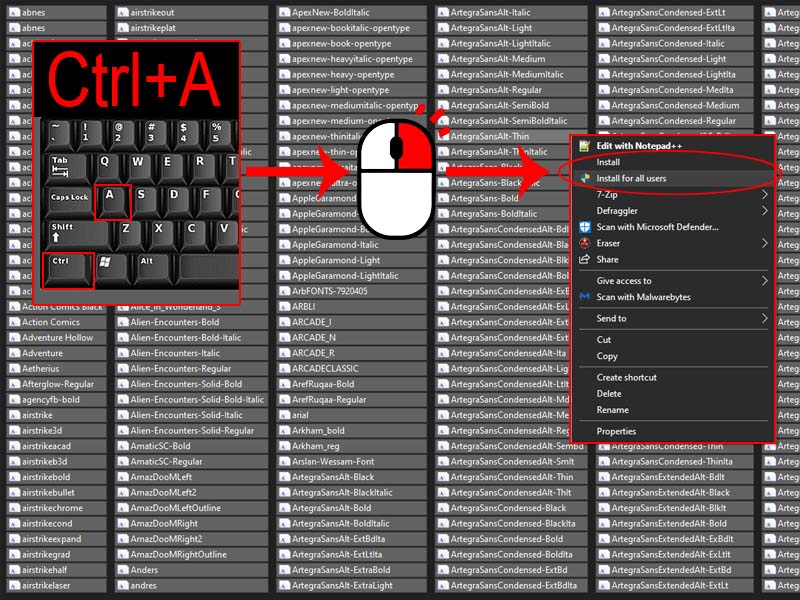
Now that you have the extracted fonts in a folder, open it and you can either select all the fonts by using the Ctrl+A keys on your keyboard or choose individual fonts by using Ctrl + Left Mouse Click then Right Click with your PC mouse and pick Install or Install for all users depending your need

If your looking to get some fonts in bulk, we’ve got you covered with 1000+ Fonts Pack that you can download for Free which contains many different styles including premium ones, CLICK HERE TO GET IT.
How to Uninstall Fonts
Either installed the wrong font, you simply want to update them or clean your collection, here’s a simple way to delete any font:
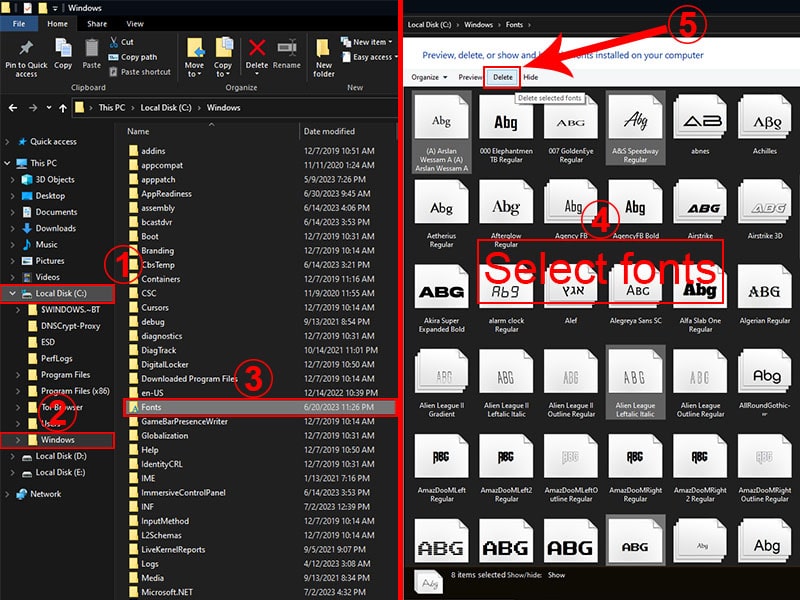
First, head to this path on your Windows PC:
- C:\Windows\Fonts
Second, select each font you wish to delete by using Ctrl + Left Mouse Click or you can go for all of them with the Ctrl+A keys on your keyboard and final, click the delete button on the top of the page then choose the Yes option to confirm (A small warning window appears to let you review and confirm the operation).


Thanks for sharing